押すと色が変わるボタンを簡単に作る方法です
UIButtonは、State Configの「Default」と「Highlighted」に別々の設定をすれば、ボタンを押した時の見た目がカスタマイズできます
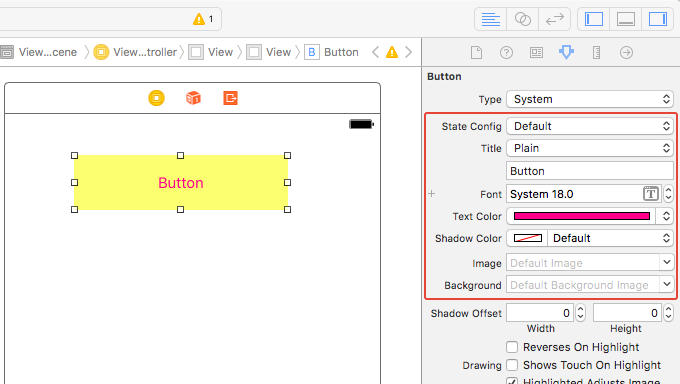
「Default」だけを設定した場合はボタン押下時に自動で色が暗くなります。画像を指定した場合は透過の部分まで暗くなるようなので注意が必要ですね

テキストだけでなく、ボタン全体の色を変更したい場合はボタンを画像にする必要があるのですが、様々な画面サイズに対応したいので、できれば画像にしたくありません。現在はフラットデザインが主流なので、ベタ塗りのボタンでも手抜き感がなさそうです。なので、背景色を変更する形で実装したいと思います
・・・が、UIButtonそのままでは対応できないようなので、UIButtonをオーバーライドして背景色を変更するクラスを作りました
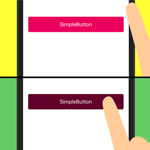
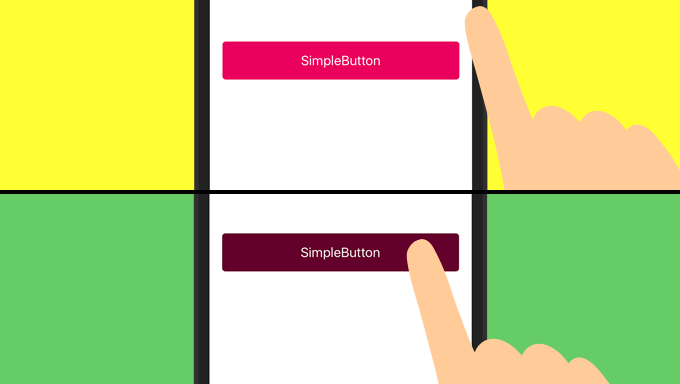
動きはこんな感じです。文字の色は変えたくなかったのでボタンのタイプをCustomにしています
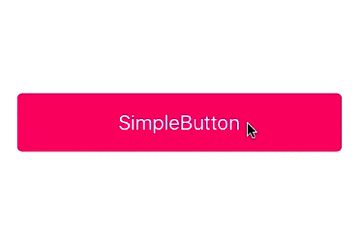
押下時にボタンの色が暗くなるのは、ボタンの上に真っ黒のUIViewを乗せて、その透過度を変更しているだけです
import UIKit

class SimpleButton: UIButton {

    var selectView: UIView! = nil

    required init?(coder aDecoder: NSCoder) {
        super.init(coder: aDecoder)

        myInit()
    }

    override init(frame: CGRect) {
        super.init(frame: frame)

        myInit()
    }

    func myInit() {

        // 角を丸くする
        self.layer.cornerRadius = 5
        self.clipsToBounds = true

        // ボタンを押している時にボタンの色を暗くするためのView
        selectView = UIView(frame: self.bounds)
        selectView.backgroundColor = UIColor.black
        selectView.alpha = 0.0
        self.addSubview(selectView)
    }

    override func layoutSubviews() {
        super.layoutSubviews()

        selectView.frame = self.bounds
    }

    // タッチ開始
    override func touchesBegan(_ touches: Set<UITouch>, with event: UIEvent?) {
        super.touchesBegan(touches, with: event)

        UIView.animate(withDuration: 0.1, delay: 0.0, options: UIViewAnimationOptions.curveLinear, animations: {() -> Void in

            self.selectView.alpha = 0.5

        }, completion: {(finished: Bool) -> Void in
        })
    }

    // タッチ終了
    override func touchesEnded(_ touches: Set<UITouch>, with event: UIEvent?) {
        super.touchesEnded(touches, with: event)

        UIView.animate(withDuration: 0.1, delay: 0.0, options: UIViewAnimationOptions.curveLinear, animations: {() -> Void in

            self.selectView.alpha = 0.0

        }, completion: {(finished: Bool) -> Void in
        })
    }
}
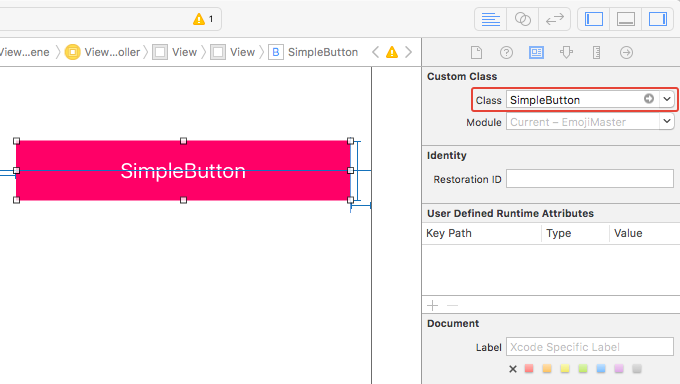
このボタンを利用する場合は、StoryboardだとUIButtonにカスタムクラスとして指定すればOK
コードで追加する場合はこんな感じ
let frame = CGRect(x: 10, y: 10, width: 300, height: 50)
let simpleButton = SimpleButton(frame: frame)
simpleButton.setTitle("SimpleButton", for: UIControlState.normal)
simpleButton.backgroundColor = UIColor.blue
self.view.addSubview(simpleButton)
使い方は普通のUIButtonと同じです